|
Will Call by Appointment Only. |
Home
48V Battery Packs
Airline Fittings
Blower Starters
Brake Components
Chassis Components
Cables
Electronic Fuel Injection
Engine Accessories
Fittings and Plumbing
Fuel and Oil Filters
Hi Torque Mini Starters
Gaskets
Gear Drives
JAZ Products
Magnetos and Ignition
King Engine Bearings
Mechanical Fuel Injection
Mechanical Fuel Pumps
Neat Stuff
Oil Systems
Oils and Additives
Total Seal Piston Rings
Safety Equipment
Smiley Header Kits
Superchargers & Components
Tools and Pit Equipment
Waterman Racing Components
Preowned-Parts
Cash for Parts
Blowers and Components Preowned
Engine Components Preowned
Fittings Preowned
Fuel Injection Preowned
Gaskets Preowned
Hose Assemblies Preowned
Headers Preowned
Magnetos and Ignition Preowned
Oil Systems Preowned
Safety Equipment Preowned
Starters Preowned
Valve Covers Preowned
Wheels and Tires Preowned


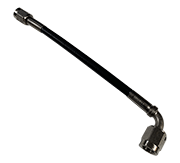
 The following will assist you in assembling Steel-Braided hose


